


These days, having no internet as a student is like being left out of the group chat: you miss everything important. Whether it’s submitting assignments, joining online classes, or researching for projects, reliable internet access is a must-have.
But what if you can’t afford it? That’s where free internet options come in, and among them, the Lifeline program stands out as the smartest solution. Read this guide to learn how to get free internet for students!
1. Free Internet Options for Students
Is there free internet for students? Yes, absolutely.
Are you looking for ways to access the internet for free?
Good news: students who struggle with internet costs do have a few options to stay connected. However, not all options offer the same level of reliability or convenience. Let’s take a look:


1.1 Public Wi-Fi and Local Initiatives
This is the most well-known and convenient form of free internet that anyone can use.
Many cities provide free Wi-Fi in libraries, parks, or community centers. Colleges and universities often extend campus Wi-Fi to nearby areas as well. Furthermore, some local governments even launch initiatives to install public hotspots in underserved neighborhoods.
While helpful, public Wi-Fi comes with significant downsides:
- It’s often slow, unsecured, and can be unavailable when you need it most.
- Plus, traveling to access public internet isn’t practical for many students.
1.2 Student Discounts from Internet Providers
Several major internet providers offer student discounts. Big carriers often run discounted plans for eligible students, usually at reduced monthly rates, especially during back-to-school seasons.
While better than public Wi-Fi, these plans still involve some drawbacks:
- Ongoing costs, equipment fees, and credit checks.
- For students with tight budgets, even discounted bills can be too much.
- Also, availability varies by region, and some rural students may find no discounted options where they live.
>>> Check out more: How To Get A Free Government Tablet With Unlimited Data In 2025
1.3 Free Internet For Students by Government – The Best Choice
Recognizing that internet access is now as essential as textbooks, the government has stepped in to help.
Previously, two key programs existed – the Affordable Connectivity Program (ACP) and the Lifeline program:
- The ACP provided monthly discounts on internet service and devices like tablets and laptops, helping millions of students access online education. Unfortunately, the ACP ended recently due to funding expiration, leaving many families scrambling.
- Thankfully, the Lifeline program is still active and available. Lifeline helps eligible low-income households by providing a monthly discount on broadband internet and phone services. Unlike student discounts or public Wi-Fi, Lifeline offers consistent, reliable service at no cost to those who qualify.
To sum up, when it comes to free internet for college students, Lifeline clearly leads the way. Let’s learn more about Lifeline in the next section!
2. How Lifeline Provides Free Internet for Students
The Lifeline program was created by the Federal Communications Commission (FCC) to ensure everyone can afford essential communication services. It reduces the monthly cost of phone or internet service for qualifying households. Thanks to this assistance, it’s easier for students to stay connected.
As officially offered by the federal, Lifeline provides a monthly discount of $9.25 or $34.25 for those living on Tribal lands on phone or internet services.


The specific benefit may vary based on your chosen Lifeline service providers. In general, through Lifeline, students can get:
- Free or heavily discounted broadband internet.
- Free talk and text services (through some providers).
- Access to critical online resources for schoolwork, job applications, healthcare, and more.
Providers like AirTalk Wireless take it even further by offering free 5G high-speed internet, generous monthly data allowances, and even free smartphones, tablets or free laptops for college students. These bundled offers make it easier than ever to stay connected without worrying about hefty bills.
3. Why Lifeline Is the Smartest Solution?
While there are several ways for students to find free or affordable internet, Lifeline stands out for a few important reasons:
- Long-term free service: Unlike temporary deals or one-time hotspots, Lifeline provides ongoing support to ensure students have internet access throughout the school year and beyond.
- Nationwide coverage: Whether you live in a bustling city or a rural area, Lifeline’s wide network of providers ensures that coverage is available almost everywhere in the U.S.
- Bundled offers from providers (internet and free devices): Many providers participating in Lifeline, like AirTalk Wireless, bundle free tablets or smartphones with free internet service. This is a huge advantage for students who may not have access to a reliable device.
- Student-friendly application process: Applying for Lifeline is straightforward and designed to be accessible. No complicated paperwork or confusing steps.
- Trusted providers like AirTalk Wireless: Are you asking: Where can I get free internet for students? Choosing a reputable provider is the key. It means students get not only free internet but also dependable customer service and technical support when needed.
With all these benefits, it’s clear why Lifeline is the smartest way for students to get free internet!
4. How to Apply for Lifeline at AirTalk Wireless to get Free Internet
Getting free internet through AirTalk Wireless is simple. Here’s a step-by-step guide to help students get started:
Step 1: Check compatibility and prepare documents
First, you should confirm if you qualify for Lifeline. Two main eligibility criteria include:
- Participation in programs like Medicaid, SNAP (Food Stamps), or SSI.
- Meeting specific income guidelines (household income at or below 135% of the federal poverty line)
For detailed information regarding Lifeline eligibility, please check this guide.
After confirming your eligibility, gather the required documents, such as proof of program participation or an income statement. You’ll need to upload them later!
Step 2: Check service availability
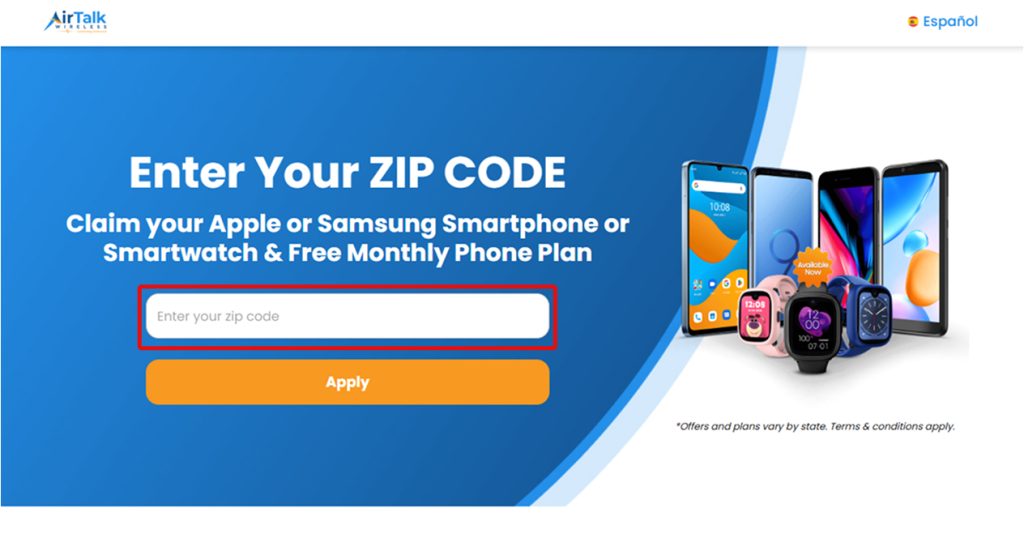
Next, head to the official AirTalk Wireless site, enter your zip code to confirm service availability in your area, and click the “Apply Now” button to start.

Step 3: Claim your free internet
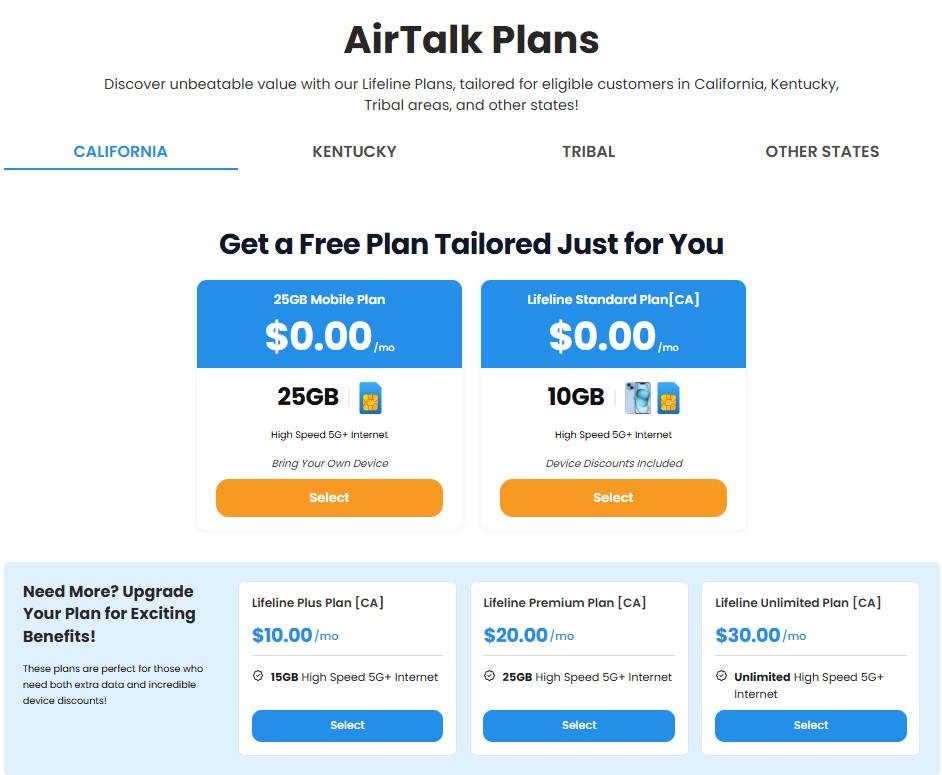
In this step, select your service plan. Pay close attention to the amount of high-speed 5G data included. AirTalk Wireless offers plans ranging from 10GB to unlimited data – perfect for different student needs.

Step 4: Choose a free device (if included in the plan)
If your chosen plan includes a discounted device, congratulations! You’ll get to pick a free or heavily discounted smartphone or tablet. AirTalk’s Lifeline benefits often include a free device — a huge bonus for students who might not have a reliable phone or tablet.
Step 5: Fill in the application and upload required documents
Complete the online application form accurately. Upload scanned or clear pictures of your eligibility documents as instructed.
Step 6: Submit and wait for approval
After submitting your application, wait for confirmation. Once approved, your free device (if selected) will be shipped to you. Follow the included instructions to activate your device and start using your free internet service.
With just a few easy steps, you can go from struggling to stay connected to having fast, reliable internet all at no cost!
>>> Read more: Can You Get Free Internet With Food Stamps?
Final Words
Internet access is no longer a luxury for students – it’s a necessity. Thankfully, Lifeline makes it easy to get reliable, fast, and completely free internet service. If you’re a student in need of a better connection, check out AirTalk Wireless today and see how easy it is to start enjoying free internet for students and even a free device!