


A photo can look ready to share until you notice a child, stranger, or private detail in the background. At that point, how to blur faces on iPhone becomes more than a simple editing question. The face must stay fully concealed without ruining the rest of the image or video.
The right method depends on whether you are editing a still photo or following someone who moves throughout a video. This guide walks through the built-in options, third-party editing methods, and final checks that matter before you post or send the file.
1. How to Blur Faces on iPhone in Photos
There are three practical ways to hide a face in an iPhone photo. Markup can cover it with a solid shape, Clean Up may create a pixelated effect on supported devices, and a photo editor gives you more control over the blur.
The methods do not produce identical results. A solid cover is often better for sensitive images, while pixelation or blur may look less distracting in an ordinary social post.
Cover a Face With Markup
Markup does not include a traditional blur brush. Instead, it lets you place a fully opaque shape over the face, which may provide stronger protection than a light blur.
Step 1: Open the Photo
Open the Photos app and select the picture you want to edit. You can duplicate it first if you want to keep a separate copy of the original.
Step 2: Select Edit and Markup
Tap Edit, followed by the Markup icon, which resembles a pen tip. Depending on the iOS version, you may need to open the More menu before Markup appears.
Step 3: Add an Opaque Shape
Tap the plus icon and select Add Shape. Choose a circle or square, switch from an outline to a solid fill, and set the opacity to 100%.
Avoid using the highlighter or a partially transparent drawing tool. Facial details may remain visible underneath, especially if someone increases the brightness or contrast of the image.
Step 4: Position the Shape Over the Face
Move the shape onto the face and use the control points to resize it. It should cover the forehead, chin, and both sides of the face rather than only the eyes or central features.
Step 5: Save the Edited Photo
Tap Done to close Markup, then tap Done once more to save the photo. Reopen the edited image and zoom in before sharing it.
Use Clean Up to Pixelate a Face
Clean Up was introduced with iOS 18.1, but installing that version does not automatically make the feature available. It requires an iPhone that supports Apple Intelligence, and access may vary by language and region.
Open the photo, tap Edit, and select Clean Up. Draw diagonally across the face or circle the entire facial area. If the tool recognizes the selection as a face, it may apply an identity-protection effect that replaces the details with large pixels.
The result can vary from one photo to another. Clean Up may distort or remove part of a face rather than pixelating it evenly, particularly when the face is small or partly hidden. Undo the change and select the whole face again if the first attempt does not work.

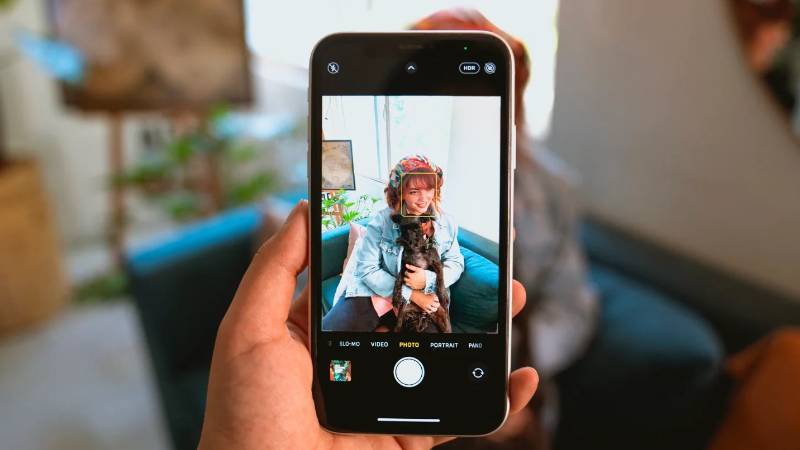
Apply a Blur or Pixelate Effect With a Photo Editing App
A dedicated editor is more suitable when you want to choose the blur strength, change the shape of the affected area, or hide several people. It also works on iPhones that do not support Clean Up.
After importing the photo, choose a blur, mosaic, or pixelate tool. Adjust the brush size, cover each face carefully, and increase the effect until individual features are no longer recognizable. Check around the hairline and jaw because small uncovered areas can reveal more than expected.
For anyone looking up how to blur faces in photos on iPhone, the app’s export settings are as important as its editing tools. Some free editors reduce image quality, add a watermark, or limit the number of files you can export. Review these conditions and the app’s photo-access permissions before editing sensitive images.
2. How to Blur Faces in a Video on iPhone
A face in a video rarely remains in one position. It may move across the frame, become larger as the person approaches the camera, or disappear briefly behind another object. A stationary blur could therefore hide the face at the beginning but expose it several seconds later.
The Photos app can trim, crop, and adjust a video, but it does not provide a complete tool for tracking and blurring a moving face. You will usually need an editor with automatic tracking or manual keyframes.
Blur a Moving Face With Automatic Face Tracking
Automatic tracking is the faster method for clips with frequent movement. The editor analyzes the video, identifies a face, and attempts to keep the blur attached to it throughout the selected period.
Import the clip and select its face detection or tracking feature. Choose the person you want to conceal, apply a blur or pixelation style, and adjust the size so the effect extends beyond the edges of the face. If several people need to be hidden, select each one separately.
Do not assume the first scan has covered the entire clip. Face tracking can stop when someone turns sideways, walks behind another person, moves quickly, or enters a darker part of the frame. Play the video slowly and correct any point where the blur slips away.

Add and Move the Blur Manually With Keyframes
Keyframes let you control where the blur appears at different points on the timeline. This method takes longer but can be more accurate when automatic tracking repeatedly loses the subject.
Place a circular or rectangular blur over the face at the beginning of the clip and add the first keyframe. Move forward until the face changes position, then reposition or resize the blur and add another keyframe. The editor will move the effect between those points.
Continue the process whenever the person changes direction, moves closer to the camera, or reappears after leaving the frame. Each additional face normally requires a separate mask or overlay.
Manual keyframes work best when the clip is short, and the person moves at a predictable pace. For longer videos or frequent changes in direction, automatic tracking can reduce the amount of frame-by-frame adjustment. This distinction is helpful when deciding how to blur faces in a video on iPhone without spending unnecessary time correcting the effect.
>>> Read more: How to Extract Audio From Video on iPhone: 3 Methods, Zero Technical Skills
3. How to Check a Blurred Photo or Video Before Sharing
Finishing the edit does not mean the file is ready to post. The editing preview may look correct while the exported photo or video contains an uncovered frame, a shifted mask, or a visible reflection.
Use this checklist after following any method for how to blur faces on iPhone:
- Open the exported file in Photos instead of checking only the editor preview.
- Zoom in on every covered face in a still image.
- Watch the video from beginning to end at full-screen size.
- Pause during rapid movement, camera cuts, and changes in lighting.
- Check the forehead, chin, and sides of each face.
- Look for faces reflected in mirrors, windows, glasses, or phone screens.
- Check whether clothing, name badges, tattoos, or school logos reveal the person.
- Confirm that every additional face has its own blur layer.
- Review the video thumbnail for an exposed face.
- Send or upload the edited copy, not the original file.
A light cosmetic blur may not be enough when someone’s privacy or safety is involved. In those situations, choose stronger pixelation or a solid opaque shape that covers an area slightly larger than the face.
4. Why Does the Face Blur Move, Disappear, or Fail to Export?
Most problems come from the tracking method, the size of the blur, or the way the final file is exported. The symptom usually indicates which part of the edit needs to be corrected.
- The blur does not follow the face: The effect may be stationary rather than attached to a tracking point. Enable face or object tracking, or add keyframes as the person moves.
- Face tracking stops during movement: Restart the tracking process from the frame where it failed. Manual corrections may be necessary when the face turns away, passes behind an object, or temporarily leaves the video.
- Part of the face remains visible: Increase the blur area and check it at the point where the person is closest to the camera. A mask that fits at the beginning may become too small later.
- Multiple faces require separate blur layers: People rarely move in exactly the same direction. Add an independent tracked effect or mask for each face rather than trying to cover the group with one fixed blur.
- The exported file does not retain the effect: Check that the effect layer is visible and extends across the correct part of the timeline. Export a short sample first. If the problem continues, restart the editor, free some storage, or try a lower export resolution.

>>> Also read: How To Reverse A Video On iPhone: 2 Ways That Truly Work
5. FAQs
Does the iPhone Have a Blur Tool?
The Photos app does not have a general blur brush. Markup can cover a face with an opaque shape, while Clean Up may pixelate a face on supported Apple Intelligence devices. Adjustable blur effects normally require another editing app.
Is There a Blur Setting on an iPhone Camera?
No. Portrait mode can blur the background behind a person, but it is not designed to conceal the person’s face.
For how to blur faces on iPhone, take the photo normally and apply the privacy effect during editing.
Is There a Blurring Filter on iPhone?
Some editing and social media apps include blur filters, but the built-in Camera app does not offer a face-censoring filter. Apply and export the effect before uploading the file so it becomes part of the final image or video.
How to Blur a Picture on iPhone Without Apps?
Use Clean Up if you have a supported iPhone and the feature is available in your region. Otherwise, Markup can place a solid shape over the face without installing another app. Markup does not create a genuine blur, but it can conceal the face effectively.
Is Pixelation or Blurring Better for Hiding Someone’s Identity?
Strong pixelation usually removes more recognizable detail than a soft blur. However, neither method guarantees anonymity because clothing, surroundings, or body shape may still identify the person. A fully opaque cover is the safer choice for highly sensitive content.
Conclusion
Photos and videos require different editing methods because a moving face can slip outside a stationary effect. Markup offers a reliable solid cover, Clean Up can pixelate faces on supported models, while tracking and keyframes are better suited to video.
Once you know how to blur faces on iPhone, always review the exported copy at full size before sharing it. Check every edge, movement, and reflection carefully, since even one exposed frame may reveal the person you intended to protect.