


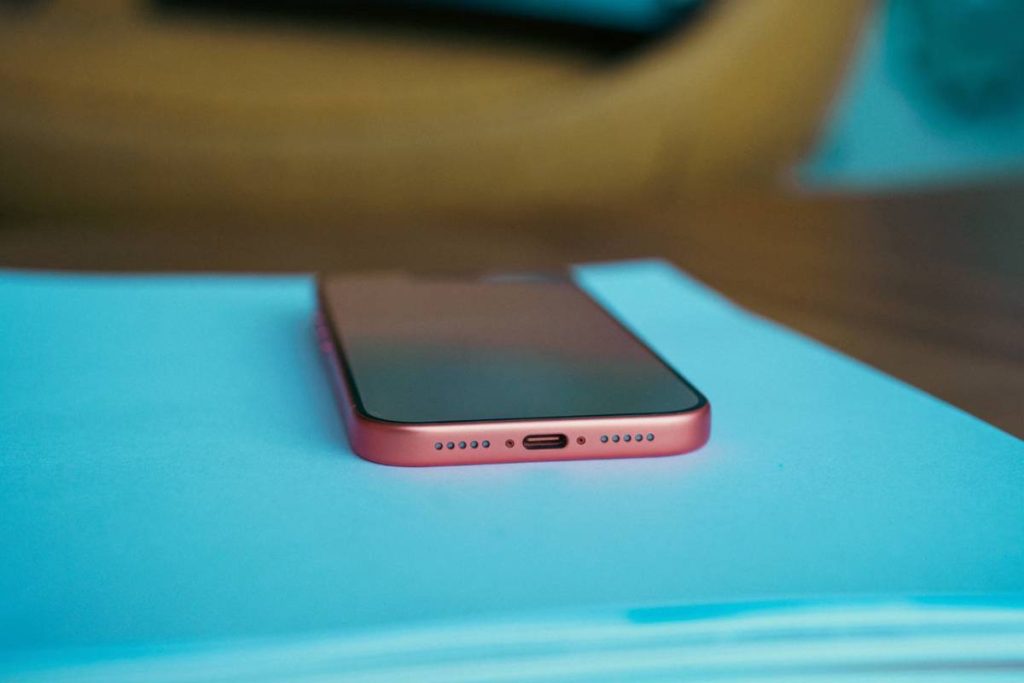
Your iPhone has been plugged in for several minutes, yet the battery percentage has not moved. The cable may be fine, but lint or dust inside the port can prevent a steady connection.
This guide explains how to clean iPhone charging port without damaging the internal contacts. It also helps you spot moisture, visible damage, and charging problems that cleaning alone won’t fix.
1. Signs Your iPhone Charging Port May Need Cleaning
Charging trouble does not always mean the port contains dirt. Check the cable, power adapter, and wall outlet as well, then compare the symptoms with the signs below.
Charging Cable Feels Loose
A connector should sit firmly inside the port without needing to be held at a particular angle. If it moves easily or slips out, packed pocket lint may be preventing full insertion.
Stop testing if the connector or port appears bent. Continued movement can damage the internal contacts and turn a small problem into a repair.
iPhone Charges Intermittently
Charging may start and stop when debris interrupts contact between the cable and the port. The charging symbol may disappear when the phone or cable moves.
Try another compatible cable and power adapter before blaming the port. If several undamaged cables behave the same way, inspect the connector for debris or damage.
Connector Will Not Fit Fully
A plug that no longer sits as deeply as it once did may be meeting compacted material inside the port. Do not apply extra force, as pressure can damage the plug or push the obstruction farther inside.
Compare the fit with another compatible iPhone if possible. Stop immediately if insertion feels uneven or requires more pressure than usual.
Visible Lint or Dust
Shine a light across the opening rather than directly into your eyes. Loose fibers near the entrance may be visible, but the metallic contacts should not be scraped or pressed.
Dark areas inside a port are not automatically dirt. The port contains small components and shadows that can be mistaken for debris, especially without magnification.
Liquid-Detection Alert Appears
A liquid alert points to moisture in the connector, cable, or accessory rather than ordinary dust. Disconnect the cable and allow the equipment to dry instead of attempting to clean the port.
Do not override the warning for routine charging. Electricity passing through a wet connector can contribute to corrosion and permanent contact damage.
Port or Connector Looks Damaged
Bent metal, discoloration, corrosion, cracked plastic, or a burned odor calls for inspection rather than cleaning. The same applies when the cable plug has damaged pins or a distorted shell.
Do not insert the cable again to check whether it still works. Arrange professional service and use wireless charging temporarily if the iPhone supports it and its exterior is completely dry.
2. What to Use and Avoid When Cleaning an iPhone Charging Port
Home cleaning should be limited to dry, loose material around the port opening. Apple’s iPhone cleaning guidance advises disconnecting cables, turning off the device, keeping moisture away from openings, and avoiding compressed air.


Items that may be used include:
- A bright flashlight positioned so the port is easy to inspect
- A clean, dry, soft-bristled brush for debris at the outer edge
- A dry microfiber cloth for the surrounding exterior
- A clean, undamaged cable for testing after the inspection
- A magnifying glass when the opening is difficult to see
Avoid the following:
- Metal pins, needles, paper clips, or SIM-eject tools
- Toothpicks or other objects that may snap inside the port
- Cotton swabs, tissues, or paper towels that can leave fibers behind
- Compressed air, which may drive debris or moisture deeper
- Water, alcohol, contact cleaner, or other liquid inside the opening
- Vacuum nozzles that may damage small components
- Forceful scraping against the contacts
- Household cleaners, abrasive products, or aerosol sprays
If debris is packed beyond the entrance, stop rather than digging into the connector. A trained technician has suitable lighting and tools for cleaning the port without placing pressure on its contacts.
3. How to Clean iPhone Charging Port Step by Step
The safest home process focuses on inspection and loose surface material. It does not involve scraping the bottom or sides of the connector.
Step 1: Turn Off the iPhone and Disconnect All Cables
Before following how to clean charging port on iPhone, unplug the cable from both the phone and its power source. Remove any connected accessory, then turn off the iPhone.
Take off a case if it covers part of the port or makes the opening difficult to see. Place the phone on a clean, dry surface with good lighting.
Do not continue if the port is warm, wet, corroded, or visibly damaged. Those conditions require drying or professional service rather than routine cleaning.
Step 2: Inspect the Port Under a Bright Light
The first practical step in how to clean out iPhone charging port is identifying whether anything is actually blocking it. Hold the phone so light reaches the opening without placing an object inside.
Look for lint gathered near the entrance, uneven buildup, moisture, bent components, or discoloration. Check the cable plug as well because dirt or damage there can produce similar symptoms.
Do not rely on touch alone. If you cannot tell whether the dark area is debris or part of the connector, leave it in place and ask a technician to inspect it.
Step 3: Remove Loose Surface Debris Carefully
For how to clean an iPhone charging port at home, keep the connector facing downward so freed particles can fall away. Use a clean, dry, soft-bristled brush only around the opening and outer edge.
Brush lightly and away from the port. Do not push the bristles deep inside, press against the contacts, or use repeated force when nothing moves.
Gently tap the side of the phone against your open palm with the port facing down. Stop if the obstruction remains lodged, as compacted debris should be removed by a repair professional.
Step 4: Test the Port With a Clean, Undamaged Cable
The final stage of how to clean out charging port on iPhone is a controlled charging test. Check that the port is dry and free of loose particles, then turn the iPhone back on.
Insert a compatible cable without forcing it. The plug should enter evenly and remain stable. Connect the cable to a known working adapter and outlet, then watch for the charging indicator.
If charging still cuts in and out, test one other certified cable and adapter. Persistent trouble after that point may come from damaged hardware, a worn cable, software, the battery, or the charging source rather than remaining dirt.
>>> Read more: How to Silence Apple Watch: 5 Easy Ways to Stop Alerts and Notifications
4. What to Do if the iPhone Charging Port Is Wet
The steps for how to clean iPhone charging port are not suitable when moisture is present. Disconnect the cable and wait until both the port and connector are dry.
Respond to a Liquid-Detection Alert
Unplug the cable from the iPhone and power source. Avoid emergency override charging because moisture may corrode the contacts. Use wireless charging only when the phone’s exterior is dry.
Let the Connector and Port Dry Naturally
Hold the port downward, tap the phone gently against your palm, and leave it in a dry area with airflow. Test it after 30 minutes, but allow up to 24 hours if the alert returns.
Avoid Heat, Rice, and Compressed Air
Do not use heat, compressed air, rice, cotton swabs, paper products, liquids, or objects inside the port. These methods may push moisture or particles deeper into the connector.
5. Why Is Your iPhone Still Not Charging After Cleaning?
A clean-looking port does not confirm that the charging system is working. If the battery still will not charge, consider these possible causes:
- The cable is worn or damaged: Test another compatible cable without exposed wires, bent contacts, or a loose plug.
- The power adapter has failed: Try a different adapter that meets the iPhone’s power requirements.
- The outlet or USB source is not supplying power: Test another wall outlet or powered USB port.
- Debris remains deeper inside the connector: Stop home cleaning and arrange professional inspection.
- The port is bent, corroded, or worn: Hardware damage can prevent stable electrical contact.
- Moisture has not fully evaporated: Wait longer if a liquid alert appeared recently.
- The iPhone is too hot or too cold: Charging may pause until the device returns to a normal temperature.
- iOS is not responding correctly: Restart the iPhone and check for a software update.
- The battery or charging circuit has a fault: A service provider may need to test the internal hardware.
- The accessory is unsupported: An uncertified or incompatible cable may charge slowly, disconnect, or display an accessory warning.
Test one variable at a time so you can identify the cause. Stop using the cable and phone if either becomes unusually hot, produces an odor, or shows signs of burning.
6. When Should an iPhone Charging Port Be Professionally Cleaned or Repaired?
Cleaning will not solve the problem when the fault comes from another part of the charging system. Test another compatible cable, adapter, and wall outlet before assuming the port needs further work.
Possible causes include:
- A damaged or unsupported charging cable
- A faulty power adapter or outlet
- Debris lodged beyond the visible opening
- Bent or worn contacts inside the port
- Moisture that has not fully evaporated
- Battery or charging-circuit failure
- Charging paused because the iPhone is too hot or cold
- A temporary iOS problem
Moisture may also leave corrosion behind after the port appears dry. Corroded electrical contacts can create safety and performance problems. If the port shows green, white, or dark discoloration, stop inserting the cable and arrange professional inspection.
7. Conclusion
Gentle inspection can resolve loose lint around the opening, but wet, compacted, or damaged connectors require more caution. Follow how to clean iPhone charging port only for dry surface debris, and seek professional service when the cable still fits poorly or charging remains unstable.
For more practical tips on using technology in everyday life, explore the latest guides on the AirTalk Wireless blog!
<<< Read more: How to Connect PS5 Controller to iPhone in 5 Easy Steps